If your business or blog isn’t using Pinterest, you could be missing out on hundreds, if not hundreds of thousands of potential page views for your website. Pinterest has been and continues to be a huge driver of traffic. And what’s the No. 1 way to drive traffic via Pinterest? Creating pin-worthy Pinterest images, of course.
Related: The ultimate guide to using Pinterest for business

Benefits of using Pinterest for business marketing
Before we go any further, let’s explore why Pinterest is so beneficial for business marketing.
A lot of people are hanging out on Pinterest
According to Hootsuite, “Pinterest is now the third-largest social network in the U.S.” While it’s important to note that Pinterest is more search engine than a social networking site, some people still consider it a social media platform. And, with 88 million MAUs (monthly active users) in the U.S., it’s a great place to tap into a new audience and expand your brand’s reach.
People on Pinterest have money to spend
Hootsuite reported, “According to a Pew Research study, the majority of Pinterest users earn more than $75,000 USD a year. That means more often than not, people who use Pinterest have a disposable income.”
You can find your people easily
As Burkhart Marketing explains, “Pinterest is much more niche-specific than social media platforms like Twitter.”
Boards and tags are designed to feature the blog posts and websites of specific categories, and if your pins on Pinterest are created correctly, you can tap into the audiences looking for exactly what you’re selling.
Creating high-quality, relevant pins and optimizing your website can set you apart and get you results on Pinterest.
Your pins can lead to long-term success
“Because pins last forever, your quality content has a longer shelf life. Feeds drive other digital channels, which means recency reigns supreme. Since discovery and search powers Pinterest, content has evergreen value. So when you create high-quality, relevant pins and optimize your website, you’ll see results.”
Being active on Pinterest can also inspire product creation and promotion
Pinterest also stated that their platform “can give you powerful signals into emerging trends and popular products in a given industry, especially in fashion, home and garden, food and beauty. Pinterest search bubbles up popular keywords and trending products in real-time.”
You can cater your business’s product and service promotions to what is currently trending. And, if you aren’t offering products and services related to trends, you may be able to pivot into creating offerings that fit the current demands.
I could go on with more benefits of marketing on Pinterest, but odds are you came to this page because you are already convinced it’s awesome and want to know how to succeed by using the platform.
And, if you want to get active on Pinterest, you must find a way to stand out. With that in mind, let’s dive into some tips for creating effective Pinterest images.
7 tips for creating effective Pinterest images
When creating images for Pinterest, keep the following ideas in mind:
- Know your intended audience and purpose.
- Pay attention to details like scene and image size.
- Develop and stick to a brand style.
- Keep it simple.
- Add text that is easy to read.
- Use tools to streamline the creation process.
- Don’t forget about the elements of a pin beyond the image.
Let’s get creative, shall we?
Related: 10 tips for creating share-worthy social media images
1. Know your intended audience and purpose
The first question you need to ask yourself is, Who is my audience? Are you targeting young adults, kids, or the working class? Determining your audience will help you with many of the other elements of your pin such as the image you use, the verbiage you write, and even the font you choose.
The second question you need to answer is, What is my focus? Is the focus on appearance, functionality, or service? And, what message are you trying to send to your intended audience?

Your answers can help you to decide which items to include in your image, and which ones to kick to the curb.
2. Pay attention to details like scene and image size
For starters, you need to decide if you will be taking custom pictures, or if you will be using stock images. If you are selling products, you’ll want to take custom pictures to showcase what you’re selling. However, if you are selling services or trying to drive traffic to a blog post or article for ad revenue, you might opt for stock images.
In the event your pin will feature a product, you’ll have to set the scene to showcase your item. To that end, the first step in creating your image will be deciding on your backdrop. Every photo needs a good backdrop.
Finding the right one all depends on what kind of look you’re going for. Do you want a simple, clean look? Pick up a white foam board at your local superstore.
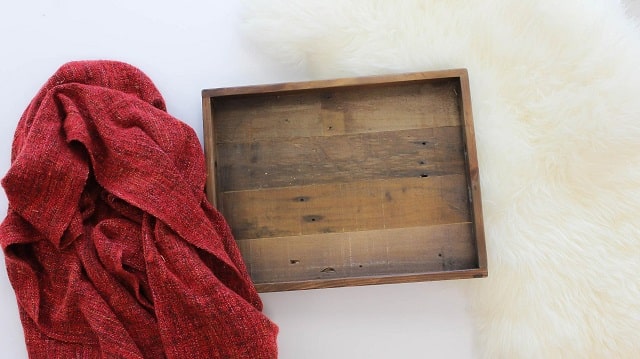
Want some oomph, but don’t want to overwhelm your products? Adding a neutral-toned fur rug provides subtle texture and lets your products speak for themselves.
Other backgrounds like your grandma’s wood floors or that colorful blanket sitting on your reading chair can be just the thing you need to liven up a photo.
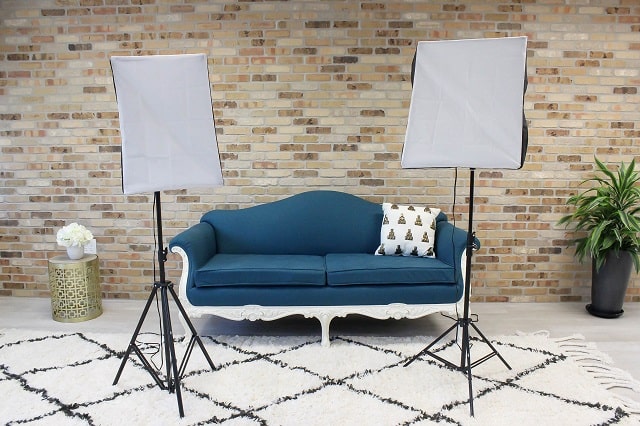
Light it up
When taking your own photos, natural light is best, so you should snap your photos during the day. On the other hand, I’m a realist who loves to work after the world goes to sleep.
If you’re like me, and can’t use natural light, invest in studio lights. You can actually find some decent kits cheaper than you might think. My kit with two studio lights and accessories was less than $200 during a Father’s Day special.
Studio lighting will brighten up any photo (regardless of the time of day) and can prevent harsh shadows. Speaking of shadows, beware of yours! When taking pictures, position yourself to avoid skulking silhouettes creeping in the background.
Create a scene
Yes. You can place your product on a simple white background and leave it at that. But to be honest? It’s boring, it’s been done before, and you know you can do better!
For example, do you have a cerulean blue couch you’re dying to show off? Cozy it up and place it in a living room setting with other homey props (plants, light fixtures, books, rugs, etc).
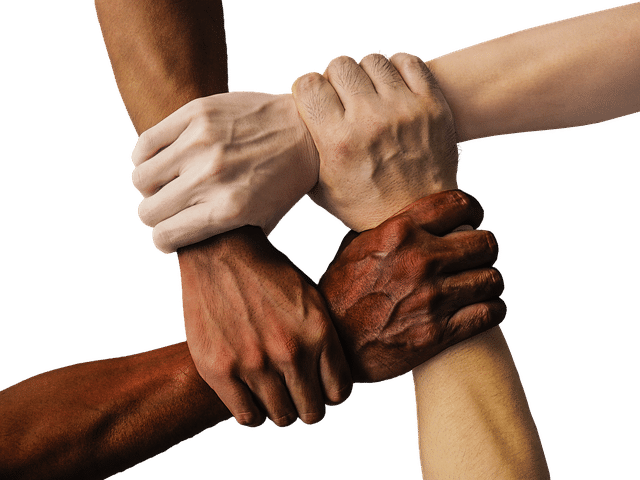
If you’re in the jewelry business, use someone’s hands to show off those gorgeous gemstone rings you put so much effort into creating.
Another tip to keep in mind, photos without faces do better on Pinterest! Pinterest is for dreamers.
For example, you have Sally Sue pinning ideas for her dream home, dream closet and dream wedding. She can’t very well dream herself into your pictures if someone else’s face is plastered all over them. So, when you’re taking photos for Pinterest, think neck down, midsection, or hands and feet.
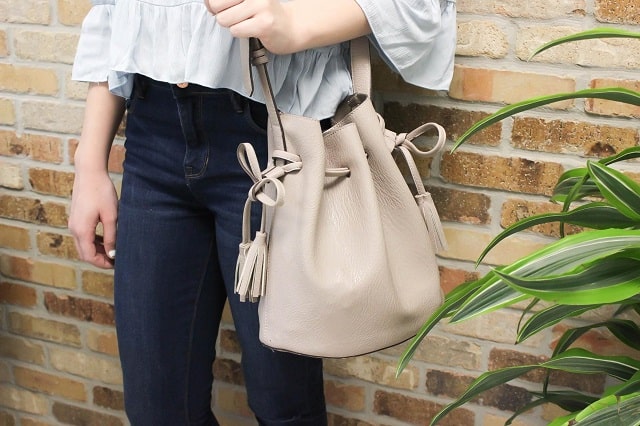 If you’re using stock photos, you can always crop out heads and faces. Or choose images where the subject is facing away from the camera.
Related: 11 places to find more diverse stock photos of people
Tinker with your toys and supplies
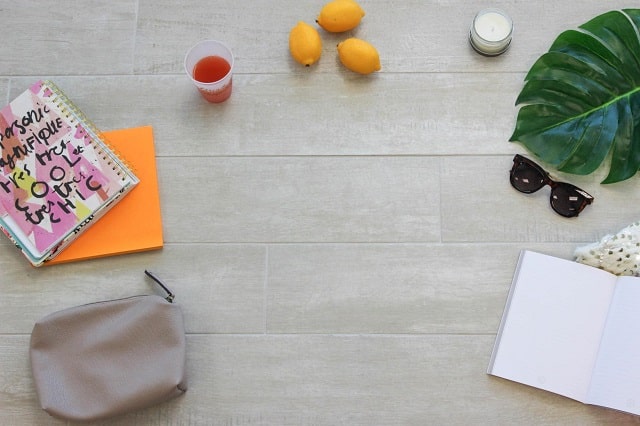
Never be afraid to play around with your items when creating images for Pinterest. Arrange and rearrange, take items out and substitute different items in.
That mini bucket of truffle fries might look good in the right-hand corner, but moving it to the upper left-hand corner could make the photo look a million times better.
Pro tip: Work in odd numbers, specifically threes. As ironic as it sounds, placing items in odd numbers evens things out.
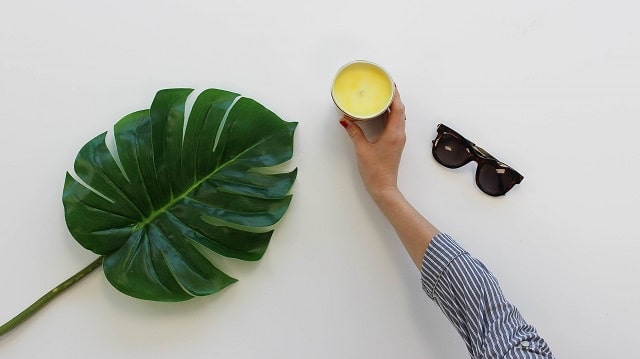
Use your objects
Unless you’re showcasing kittens, your objects can’t move around and make themselves look good. That, dear friends, is your job — so move and use your objects!
If you have a magazine in your photo, don’t feel limited to the cover. Open it up! You’d be surprised at how much a photo can change just by flipping to different pages in a magazine.
If you have a cup in your photo, pour something in it! It makes your setting look more realistic and let’s be real, ain’t nobody drinkin’ air for breakfast.
Pay attention to the minute details, too
It’s the little things that make life go ‘round, right? Make sure that shot glass that says “Mondays” is turned towards the camera. That lime slice sitting in the corner? Make sure it looks juicy enough to say, “Squeeze me!” not “Throw me in some water because I am bone-dry.”
Once you fix the details, take a step back and look at the entire picture. Double-check to see that nothing is cut off and that there aren’t any unwanted people or body parts (heads, thumbs, big toes) lurking in the background.
Consider including some blank space
You may want to add negative (also called white space or blank space) somewhere in your image to make adding text to the photo easy during your editing process. Your Pinterest images should include either a product name or a blog post title.
Some people choose to overlay the text directly on the image, whereas others will include negative space where their text can fit.
Play with your angles
You don’t have to shoot images head-on. Lie on the ground, stand on a chair, or do a Matrix-style backwards lean in order to get the angle you want.
When it comes to photography, there is no room for embarrassment. Sometimes, you gotta make yourself look like a fool to get that perfect shot.
Use the right size for best results
When cropping your images, you should use a 2:3 aspect ratio for all of your pins. Pinterest found that this is the ideal ratio for Pinterest images performance.
What does that mean exactly?
According to Pinterest, “it’s just a way to talk about an image’s width, compared to its height. A 2:3 aspect ratio means that your image’s width is ⅔ its height.
For example, your pin could be 1,000 pixels wide, by 1,500 pixels tall. If your image falls outside this ratio, it could get truncated in people’s feeds and they won’t get to see your full pin.”

Related: Social media image sizes — The 2020 cheat sheet
3. Develop and stick to a brand style
Branding your Pinterest images could mean using the same colors for your backgrounds. It could also mean using the same font for all of your pins. Or perhaps you have created custom board covers that use the same color schemes and fonts as your website and social media profiles.
Carrying your brand style over to your Pinterest images can make creating images for Pinterest much faster. This is especially true if you use Pinterest templates, but we’ll get to that in just a moment.
Related: Everything you need to know about creating a brand style guide
4. Keep it simple
There is such a thing as trying to put too much in a Pinterest pin. Overloading an image with text, or using a picture that is “too busy” can distract your ideal audience from what you’re trying to sell or promote. Even writing too much in your description can overwhelm your audience.
5. Add text that is easy to read
When creating images for Pinterest, you should overlay text on them that either explains the image or at least captures someone’s attention. You can add an eye-popping headline, or at least text in a readable, contrasting color.
It’s also a good idea to add your website somewhere on the pin so that no matter how it’s shared, viewers will know where it came from.
Make sure all text is easy to read – i.e. be careful about the color of font over dark and light backgrounds.
Here’s an example from a Canva template of a great pin that is simple with easy-to-read text:
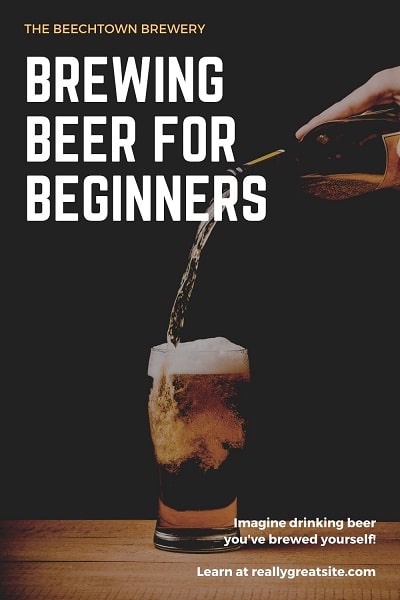
The image isn’t too busy, and the text is easy to read. There’s plenty of blank space, and it’s clear that what’s being sold is a beer you brew yourself. It’s also branded with a website and a company name so you know all the pertinent details about the company that produced the pin.
Now, for contrast, here’s an example of a bad pin:
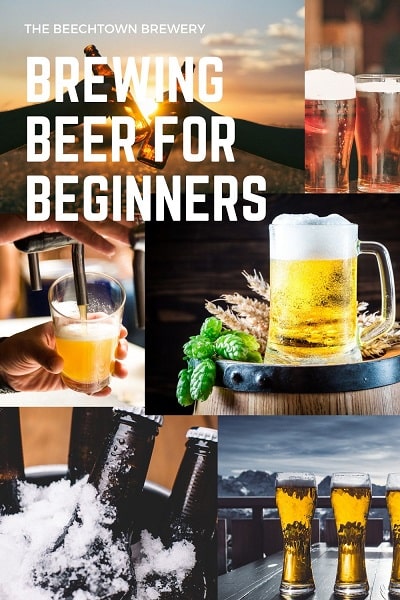
Rather than shame businesses I’ve seen that have horrible pins online (and trust me there are plenty of them), I created a bad mock-up for you. What’s wrong with it?
First, it’s too busy. While collages can be great for Pinterest images, this one is so cluttered the eye doesn’t know where to focus. The white overlay text is harder to read with these images as well. If your audience has to squint to decipher your message, you’ve lost them.
There’s also no website mentioned here, so if anyone steals the pin (which does happen by the way) no one will know you were the original owner.
6. Use tools to streamline the process
Creating Pinterest images can be a time-consuming process. But, using tools such as Canva or PicMonkey can help you cut your creation time significantly.
Create a custom template of your own with your favorite font and brand style, and then you can drop in new images and text overlays as needed for future pins. Simple.
To batch scheduling pins to go live on Pinterest, use tools such as Tailwind so that your Pinterest feed will never run dry.
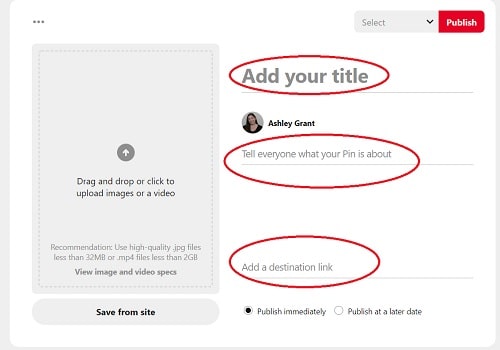
7. Don’t forget about the elements beyond the image
Planning, styling, editing and sizing your Pinterest images are important but don’t neglect the elements beyond the image as well. Each pin that you load needs an image, a title, a proper description, a destination link to the post or page you are trying to direct traffic to and should be categorized/tagged in the correct niche.
For example, if you are loading a pin for hair styling tools, you don’t want to put it in a board for gardening equipment. And, you don’t want your destination link to be your homepage. Instead, it should link to the unique page or post that your pin is referencing.
Pro tip: Include a call to action in your description so there’s no question as to what you hope your audience will do with the information related to your pin.
Your Pinterest description can be up to 500 characters, and Pinterest recommends writing as much helpful information about the pin as you can. I’ll add to this that you should include the same keywords that you’ve added in your web link so that it is more likely to show up in search results.
Pinterest also states, “The first 50-60 characters are most likely to show up in people’s feeds, so put your most important info first.”
Click here for Pinterest’s instructions on how to build a pin.
Next steps
Are you still with me? I know there’s been a lot covered here, but don’t let all these tips and ideas overwhelm you.
Once you get into the swing of things, I’m sure you’ll find that it’s much easier than you might have thought to create pin-worthy Pinterest images.
Your next step is to create a business account on Pinterest.
From there, begin creating and adding pins to your Pinterest account. Add yourself to group boards to garner more attention, and encourage your fans on other platforms to follow you on Pinterest.
Before you know it, I have no doubt your Pinterest page will be filled with amazing pins that will hopefully yield a massive amount of traffic.
Editor’s note: Need help managing your social media platforms? GoDaddy Social has got your back.
This article includes content originally published on the GoDaddy blog by Shanna Fujii.
The post 7 tips for creating pin-worthy Pinterest images appeared first on GoDaddy Blog.