Being a freelancer is a daunting task for anyone. Be it a designer, writer, developer or UXer, freelancing is a full-time — and sometimes a 24-hour job. You will need to anticipate, plan and confirm your client’s needs and wants, and deliver with limited time and resources.
Sometimes, you need to accomplish tasks with limited information as well, a situation that no one would ever want to be. But hey, the rewards are sometimes worth the risk (and pain!).
When onboarding clients, you will need ways to know and understand them. You can use the usual channels, such as an interview or voice call. However, these usual methods may feel lacking, depending on what you want to accomplish. First-timers are also prone to lose themselves in a sea of information, and you’ll need ways to navigate it.
Fortunately, there are tools that you can use to help streamline your workflow in getting to know and in understanding your client.
These tools should help you better capture ideas, concepts and needs for you to be able to deliver on time with little to no revisions. Here are some of the tools that I have been using and why I think they’re worth your time. Though these fit in my personal workflow I believe you may find something will work for you.
1. Miro

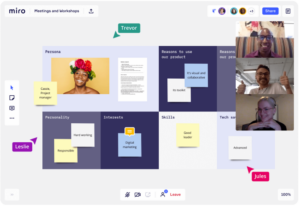
Miro is: Perfect for grabbing your client’s likes, dislikes, design pegs and ideas. Very effective when used in conjunction with a video conferencing tool (i.e. Zoom). I usually use these in UX sessions with both clients and team members, especially the end users.
I have used Miro for some time now, especially with design activities and workshops.
Miro’s best feature is its clean UI, intuitive actions, and responsive interactions. Editing in Miro is a pleasure to experience. This, coupled with a real-time editing function for your work, is a very conducive environment to get creative.
Miro has collaboration built-into its DNA. It has a chat, a real-time editing feature, and a live cursor view. These features mean added interactivity, making conversations livelier than before. This makes people more open to communicate, which is your aim when gathering information.
What else can I say?
Miro is essentially a sandbox where you, your team and clients can play around with ideas, notes and more. Project management can also be done within Miro, and with its real-time updates to the dashboard and to the workspace, it will feel like that you’re working in the office once again.
All in all, Miro is a solid tool for you to try and use when collaborating with people. The downside is that if participants aren’t exactly motivated to participate in these kinds of exercises, Miro’s features will fall flat.
2. Milanote

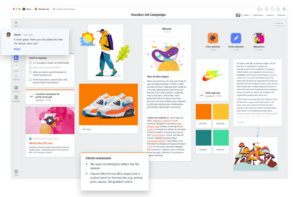
Milanote is: A structured way of capturing ideas, organizing your projects and collecting assets. Folders and projects can be nested infinitely, so you can drill down deeper into a concept as needed. Best for visually organizing design pegs, artwork, and drafts. Collaboration is good since you can edit and comment in real-time, share with teammates, and invite clients as collaborators into your workspace.
Milanote has always been a darling for those who love good visuals and features in an app.
Milanote’s strength is in its organization: You can create projects within projects, or even folders within a project. You can nest a lot of these within projects or activities.
This allows you to organise information or projects from huge, strategic, overarching plans down to multiple subtasks nested within each other. Like Miro, you can collaborate with other team members — but it focuses on visually organising your projects, notes and comments.
As Milanote is akin to a planner (albeit a more collaborative and visual one), you can create projects using built-in templates that can easily guide you in completing them.
Milanote also has a lot of collaborative features such as tagging, commenting and more. And since everything is organized visually, it is easy to navigate and work with no matter what role you’re in — be it developer, designer, writer or project manager.
Another strength to consider is that Milanote has a web clipper — something that Evernote and Microsoft OneNote also have. This web clipper saves your clips in your Unsorted pile in Milanote, where you can categorize it later. Perfect for mood boards!
Looking to integrate Milanote? Integrations can also be found here.
3. Notion

What it is: Another definite contender for being a top data collection tool for onboarding clients. You can set it to have databases, folders, nested projects, knowledge bases and more. Notion has workspaces and shared notes and docs. It’s very useful for teams and in agencies.
I have seen Notion in action mostly by other teams such as system integrators, engineering and marketing. Notion is an all-in-one platform for collaboration. You can build internal tools such as tables, databases, wikis, notes, notes, project manager and a customer relationship manager (CRM).
It makes use of Blocks as a storage unit, and the paid versions give you unlimited blocks for uploading to the workspace.
You have all the bells and whistles for a team collaboration software, such as live editing, shared workspaces, shared docs and task management. Like Milanote, Notion also has a web clipper, so you can quickly store references and information from the web if you’re doing research.
Capturing data from clients using Notion is similar with other collaboration tools: create a page/wiki to share with a client, grant access, and then discuss within the app.
Another key feature is that Notion can be integrated with services through Zapier and Automate, so if you already have an existing page or web form that captures client requests or requirements, you can easily redirect the flow from there into a database in Notion.
This guide from the Notion team also details how you can do it.
Notion shines the best if you have a paid account, but has a free tier that is limited with what you can do for your business (though you can be really crafty and can still use Notion despite the limitations on free). You won’t be able to run your business on that platform, but you can collaborate with your clients and team members (or family members) with Notion.
4. Evernote

What it is: I use Evernote to capture information and client requirements. I also collect data, samples and sources from the internet using Evernote with its browser add-ons (primarily Chrome). Also, creating new notes in Evernote allows you to use one of their built-in templates — where you can start a project, weekly plan or a plain checklist. One more powerful capability is for you to make templates for new notes — perfect if you have a format you prefer over the default ones.
Evernote has been my go-to tool when it comes to taking notes, capturing ideas, and sometimes just jotting in drafts and sketches. When writing meeting minutes, Evernote is also a really good tool as it has a library of templates to choose from: GTD, meeting minutes, project planning, marketing, sales calls, agenda, and novel plotting!
Since Evernote has a large community of users and advocates from across industries, you will always find tips and tricks for using Evernote for a specific task.
With near-unlimited storage capabilities even at the free tier, you can make use of Evernote without breaking the bank.
Another favorite for me is the WebClipper, which I have used extensively ever since I have started using Evernote (in 2012!). This web clipper can simplify an article’s formatting for saving inside Evernote, making it easy to read on tablets and mobile devices.
Another strong point for Evernote is its integrations with different services, giving you the capability to automate your data capturing workflow. As an example, if you have your clients over at MS Teams, or in Slack, you can easily push your conversations into an archive in Evernote for easy searching and access.
Capturing client requirements using Evernote would also have a somewhat simple workflow: create a note with forms in it, share the note to a client for editing — though this will require the client to have an account in Evernote, so your mileage may vary.
It works best in conjunction with existing conferencing or collaboration tools, such as Zoom or WebEx.
One pain point for me in Evernote is that you can’t draw over your existing typed text. It might not be a dealbreaker for some, but for me it diminishes a bit of the ease of use and the flexibility of Evernote as an all-in-one note taking and collaboration app.
5. OneNote

What it is: My fallback tool. If anything, OneNote offers a blank canvas — both a strength and a weakness — where you can write ideas, draw them and more. The single most important feature OneNote has over the rest is the capability to type in text, and then write over the typed text. This level of flexibility has been very helpful for me when capturing ideas, especially when meeting face to face with clients that are chatterboxes.
OneNote comes free and usually preinstalled in most Windows devices, so it’s easy to get into the OneNote game. It is basically a one, huge, blank notebook where you can add almost anything: images, text, links, articles, sketches, and even embed videos.
You can integrate OneNote with certain services, too, through Zapier.
OneNote also carries with it your Sticky Notes, which are accessed normally through the Windows desktop app. On mobile, these Sticky Notes are accessible and searchable. If you have a pen you can even draw on them. What’s best is that you can draw on existing images and text!
As this is primarily a note-taking app, why would OneNote be here in this list?
It’s very effective when used in conjunction with other tools. Its blank canvas is as powerful as it is daunting: you can do, write and draw anything with OneNote. But at the same time, it isn’t a tool to be used alone. You use it with conferencing tools, such as Zoom, WebEx or even MS Teams. If you and your team are in Office 365 or Microsoft 365, it works well and is tightly integrated with all Office Apps (Word, Excel, Outlook, Power Point, etc.).
My workflow
In my workflow, I use a mix of all these tools, but not exactly all of them. I use mostly two or three at a time. Some examples:
Step 1
For a design project, I call and chat with a client while sharing screens on Milanote. Afterwards, I create a list of action items in the app, then share it with the client. I can also create a project Mood Board for setting visual pegs and design ideas to set the overall direction and tone. Clients and team members comment on the mood boards and design pegs, after which can be used as a basis for the work in the next step.
Step 2
For a writing gig, I typically interview the client with regards to the direction and vision. I use Evernote’s built-in templates to interview and capture information. Some clients I have worked with in the past (pre-COVID) would get interviewed face to face, taking note of what they talk about when it comes to their overall direction and vision of the final product.
This differs though for technical writing projects, where there is a set standard of writing style and structure. What I do instead for these is to figure out the overall tone of the docs, whether it be conversational, or perky, or lively, or neutral. After which I share the note with the client finalizing the style, and then I commence work on the outline and drafts.
Step 3
For development projects, it runs almost the same as the design project. I add an extra note where we list all of the requirements needed for the app, as well as design pegs that the client has in mind for the UI and UX of the feature. We run these workshops with the client and its stakeholders to ensure that what we capture is comprehensive enough to build a viable product that they will be both proud of and enjoy.
Step 4
For project management tasks, I mainly use Milanote to collaboratively share and annotate tasks with the team and the client. If there is an accessible code repository and design asset library, I link it within Milanote for them to work with. If I am collaborating with large teams, Miro and Notion gets the bigger slice of the pie, but it largely depends if the team is already on board the platform or not.
Conclusion
To summarize, use tools that work for you and your team. Tools work best only when their users know and work with the system to its capabilities. Any one of these tools can (and will) shine through the darkness of uncertainty, especially when working with new projects, clients, and ideas.
Most of these tools have overlapping features and capabilities, and it doesn’t hurt to test them out!
Go ahead and experiment with these and see what works and what doesn’t. And finally, no tool is used alone — there will always be gaps in a product, even with the most well-thought systems. Keep in mind to save a backup of your work somewhere as an archive, so you will be sure to have access even when the systems go down or become inaccessible.
The post 5 useful tools to understand your client’s needs appeared first on GoDaddy Blog.


